The set of 3 levels take place near Blackwater Rapids, leading from the lower portion of the river into the set of mountains there. The enemy further explored here is going to be the Bandersnatch of all creatures, because it really is a cool enemy, both appearance-wise and how it's a fast yet also durable foe. Let's do this!

LEVELS
Lamenting River
Dear general, your succour is once again needed! The Elven outpost, set up to keep an eye on the mushrooms and Gnomes in case things go out of hand, has been ravaged by an unknown attack force. We have followed the trail of the Elves' burned and maimed corpses down the Blackwater Rapids, appalled by what had become of their bodies. A truly brutal and merciless threat lurks in these regions, but our scouts know a few things about them.
The beasts of the Fae Forest known as the Bandersnatches take refuge here when they're not hunting Gnomes. We'll likely disturb some of their lairs on our way, so we must be ready for what's to come, for more than just normal beasts prowl these lands...
Orange and red lights flicker from the trees. Creaking noises and the horrible sound of metal scratching other metal resonates from the forest and comes closer and closer to our location. It would be best to set up camp here and defend ourselves from the incoming enemies, hopefully protecting the outpost and forest from any further violation.

Returning enemies: Bandersnatch, Redcap
New Enemies: Forgesnatch, ...
ENEMIES
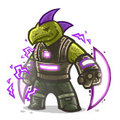
Forgesnatch
Mechanical mini-replicas of the Bandersnatch made by a scientist with unnatural fascination with the creature for the one goal of dominating the Fae Forests through relentless onslaught.
The Forgesnatch is a smaller Bandersnatch made of metal, and is thus purple and grey, with deep red glows coming from its mouth and eyes, which is the heat generated inside of its core. This core has so much heat, in fact, that it tends to overload when anything gets damaged.
HP: 320/400/480
Melee: 8-12 physical, once per 1.5 seconds
Armor: Low (15%)
Speed: Fast (like the Bandersnatch, it rolls to progress along the path)
Lives: 1
Gold: 15
* Detonation
-Upon death, the Forgesnatch locks down for 1 second before exploding, dealing 80 True Damage in a moderate AOE to your troops.
Tactics: This is the key enemy of the campaign, assaulting the player in large groups at once, very often. Unlike any other enemies, their combination of fast speed necessitating barracks to stall them and their explosion upon death that counters barracks creates a scenario unseen in Origins as of yet: Druids are the best tower to use. Burst Arrows or Eldritch Doom will not deal enough damage to kill them instantly, forcing the archers or mages to pick off the Forgesnatches in ones or twos. However, because they show up in larger groups, the first to die will burst through the barracks and allow the others to make it through. Having multiple upgraded barracks to stall them long enough for Druids to use their AOE to kill the Forgesnatches all at once will result in an explosion chain that can't be survived, but with them all dead at once, no enemies will be able to continue forward.
Cybersnatch
Metal and wires conflicting with skin and blood vessels, these abominations are hindered by unnatural alterations but are nonetheless extremely tough.
A Bandersnatch which a cyborg design. One arm and one leg is a metallic, grey and blue one rather than the normal light purple arms and legs. Both eyes are robotic, glowing red, and about 1/3 spines are robotic as well, with the rest being mostly bent or snapped spines.
HP: 3,000/3,600/4,200
Melee: 30-60 Slow AOE slashes
Armor: 50% (Medium)
Speed: Slow, limps to its destination with a mixture of determination and hopelessness.
Gold: 175
Lives: 3
* Detonation: After dying, it locks down for 1 second before exploding for 300 Physical Damage and stunning towers for 2 seconds, not stacking the stuns.
Tactics: Though slower and with damage weaker than normal Bandersnatches, it has more durability with armor countered by barracks and artillery True Damage. It also gives a lot of gold, serving as a pseudo-mini boss that should be killed after all other enemies have been wiped out, as the explosion will finish off barrack troops.
Hellbringer
Flamethrowers programmed to seek and destroy all in their path, they make up for some glitches by being the best at what they can do right.
With the metallic spines and body of a Bandersnatch but the insides of a fiery machine, these creatures are about twice the size of soldiers and stronger by an even larger scale factor. Their arms are still and they can only move via 4 small wheels at their base that carry them forward, but when facing forward, they can spew red fire at foes. A blue glowing core is inside of them that turns more red as it keeps shooting fire.
HP: 640/800/960
Melee: 10-10 Spews flames dealing continuous damage every quarter of a second as fire damage to a single target
Armor: Medium (35%)
Speed: Medium (Sluggish like Blood Ogres and their kin, eve though they're ranked as medium)
Lives: 1
Gold: 45
* Overheat
-After shooting flames for more than 6 seconds, it will overflow with heat and explode for 120 Fire Damage.
Tactics: Having high-level barracks is very important to taking down these enemies, as they can force them to overheat and explode, but killing the troops in the process. Thus, having multiple layers of barracks throughout the level can really benefit, or just using Runed Bears, as they have high HP but not that much armor, making them great for tanking the fire damage, along with help from the Forest Keepers' Circle of Life. Using Fiery Nut on them or any other source of the burn affliction (excluding magical flames like Liquid Fire) will automatically cause them to detonate as soon as they try to use their fire breath, instantly killing them for better or worse.
Mechanics
Bandersnatch Lairs
A "Do Not Disturb" sign is placed next to each of the 5 dark caves located apart from each other throughout the level. Tapping on the signs gives a pop up similar to when the game is informing the player of a tower's stats and purpose. It reads:
The beasts here are asleep. Disturbing them will provoke constant attacks on us, leaving us and the Bandersnatches' gold vulnerable.
Tapping on the lair or the sign a second time will result in awakening the Bandersnatches, causing them to attack the player. Per cave, one Bandersnatch rolls out every 30s, and gives the player the same gold as normal for killing them, a risk vs reward scenario. Activating every lair will surely lead to a lot of enemies constantly attacking the player, but at the same time, providing enough gold to keep them at bay so long as it's spent wisely.
Flooding River
The river splits into 2 watery paths that overlap with the dirt paths that enemies and soldiers stand on. As such, they can move over the water, getting their ankles and socks wet at worst.
However, at waves 7, 10, 13, and 14, the rivers flood. Loud ly rushing water can be heard a few seconds before the water hits, taking out any soldiers or enemies that happen to be in the water at the time. Robots that explode in the water send out electrical volts, dealing the same damage as the explosion but in a larger radius, possibly clipping troops if they're both on the edge of the water and killing them.
Tall and very heavy units like normal Bandersnatches and Razz and Rags lose 50% health rather than being flooded. Being trees, Bravenark and his Greenlings fully heal in the flood water, and slowly regenerate 1 health per half second in the normal waters. Phoenix cannot perform Immolate over the water, and Arivan cannot use his ice or lightning abilities without causing an AOE that harms allies as well as the same effects in them.
Wave Composition
1) Starts with some Bandersnatches, rolling in one by one with noticeable time between each. A Golden Longbow with Crimson Sentence can get you through this if you're lucky, but upgrading your barracks and simply buying Hunter's Mark is more cost effective.
2) A Cybersnatch appears, with another Bandersnatch rolling in, going past him and engaging your defenses. Any powers will be sponged by this Bandersnatch, leaving the player some time to see the Cybersnatch in action. He is very unlikely to get past anything if you've come this far already. After awhile, another Cybersnatch appears.
3) The Hellbringers show up in a group of 2, ready to burn through anything that doesn't have 480 health for each of them to overheat from. Lightning or usage of a Hero Spell is encouraged here. Then comes another Bandersnatch to provide the player with some more gold.
4) Here, the Cybersnatches come in groups of 3, twice with some time between each spawn, along with plenty of Redcaps swarming at the same time, encouraging the player to finally build some high level Druids.
5) Plenty of Hellbringers appear, in groups of 3, so they should be kept at bay with some barracks. The player may have enough gold to get Runed Bears now, which is greatly encouraged by the next wave.
6) Here come the Forgesnatches, in small swarms of 4 and some times 5, with a Cybersnatch in between as well. They will come often in those big groups, but with enough time for the fallen Runed Bears to respawn and block anymore enemies before they can finish off the barracks in the back.
7) A massive army of Hellbringers and Forgesnatches spawn here, enough to be a considerable army of sorts. If the player can hold off about 10 Forgesnatches with all of their barracks, reinforcements, Bears, and hero, then the remaining 30 or so enemies will be flooded by the river, granting a lot of gold.
8) Forge and Cyber snatches appear quickly and in groups, spread out all over the map. More artillery and barracks in various strategic locations to handle these swarms is necessary, as they will break through the first two lines. Thunderbolt cannot stop every wave, but it can buy some time for players trying to set their rally points.
9) Hellbringer spam from both paths encourages leveling up the barracks rather than artillery to Lvl 4. Blade singers are especially good, as Perfect Parry can save them from some of the fire as it's very likely to occur with each increment of constant damage, and 2 seconds matters more to these enemies than any other. Plus, they can block all 3 of them in their groups of 4, while the extra one is taken down by reinforcements or the hero, and possibly some towers.
10) The spam of Hellbringers heightens, and Cybersnatches start to appear. They're oriented in a way that requires them to be held in place for a while until the flood comes in. Using the lightning strike is necessary to slow all of them down long enough to still be taken by the flood, and will have to be used regardless if any enemies make it through the flood zone.
11) Cybersnatches and Forgesnatches come together, with the Forgesnatches serving as cannon fodder until the Cyrbersnatches can make it past the defences. Hero spells and reinforcements should be used to hold them down, either by killing the Forgesnatches early or finishing off the wave by killing the Cybersnatches.
12) With a solid crowd control defence, then the armies of Forgesnatches should be easy to hold off. Properly balance Druid attack power with barrack stalling power to counter them, and focus spell usage on the left path to control the Hellbringers that come there as well as more Forgesnatches. Some time in between, Cybersnatches spawn from each path in pairs, and have Hellbringers flood in after that.
13) The armies of Hellbringers are supported by Forgesnatches, which can charge through an unprepared defence. Some upgraded Bladesingers spread out on multiple locations along the same path can take out the Hellbringers and let the passing Forgesnatches be taken in by the secondary and tertiary lines of defence. The rivers will then flood, wiping out the enemies. With the bonus gold, upgrading the Golden Longbows is recommended to handle the multiple Cyrbersnatches.
14) Normal Bandersnatches accompany the remaining Cybers, filling up the area with lots of large enemies. Area damage can weaken them to the point of letting lightning strike and a hero spell eliminate them all if used on 2 separate paths. More Hellbringers come, now in very large groups of 8 or more at a time, with only a few seconds in between. Without spells to use, they will make it far, but holding off long enough until the rivers flood again can stop the majority. After flooding, the remaining Hellbringers will be supported by Cybersnatches that come in, with almost equally large numbers.
15) In this finale, Bandersnatches and Forgesnatches charge relentlessly, providing a constant demand for DPS and crowd control. The consistency supplements the Hellbringers and occasionally larger waves of Forgesnatches that require more micromanagement of barracks to survive. This goes for a while and escalates, until finally, a group of 20 Cybersnatches spawn in the middle path and need to be taken down to win.
Level 2: Blackwater Cave
After fending off the beasts and machines, we journey further down the Blackwater Rapids to find the entrance to a cave. Our scouts tried to enter the cave but were caught by some sort of technology protecting the entrance. Any troops that go near are blasted with thunder, not from the skies, but from more vile sources in the form of towering machines that have inhuman accuracy.
We must set up camp once more, outside of this cave, until our Gnomish allies from the Fae Forest can heed our calls for help and use their technological prowess to bypass the thunder blasts. Only true geniuses with immense technological prowess could ever hope to figure out how to counter an opponent using towers to shoot down troops! Until then, we shall face whatever horrors await us from this mysterious lair of contraptions and monstrosities alone.

ENEMIES
Returning: Bandersnatch, Forgesnatch, Cybersnatch, Hellbringer
New: Terminator, Absorbaton, Tunneller
Terminator
Built to kill, and built with skill.
A tall, silver humanoid figure with glowing green eyes instead of the blue and red that previous enemies have had. It has an exoskeleton of thin tubes connecting to its ribs, arms, legs, and head. From its arm, it can launch green laser beams.
HP: 400/550/700
Melee: 40-60 Physical, attacks once per 0.67s
Ranged: 40-60 True, shoots once per 1.5s
Armor: Medium (50%)
Speed: Average
Lives: 3
Gold: 50
* Targetting System
- Shots will mark targets with a Hunter's Mark glow but green, which triples the damage they take for 3 seconds. They will prioritise unmarked targets nearest them with their bullets. Doesn't apply to melee attacks, nor will it stack.
Tactics: These enemies are built to slay barracks, which are a necessity for the other foes you will face. As such, they need to be killed swiftly in order to prevent them from making a clear path for the quicker enemies. Spells are the best way to do this, but the micromanagement of units and certain towers will be a much more reliable way to eliminate them, as they will appear too often for spells to always work.
Tunneller
Designed by an improved creator from the previous mechanisms, they use the speed of the Bandersnatch form to carve through the earth itself.
Larger than Forgesnatches but smaller than Bandersnatches, the Tunnellers go underground, with the lustrously silver tops of their backs sticking out and spikes that cleave through the ground in spinning motions. The spinning is less quick as they move through more and more troops.
HP: 500/650/800
Melee: 10-20 Slashes through troops as it moves, naturally every quarter second, but the rate halves with each troop.
Armour: Low (30%)
Speed: Very Fast, much faster than fast enemies, about 150% that of a Bandersnatch, dodging past projectiles naturally. However, each troops that it moves under halves the speed that it can move.
Lives: 1
Gold: 45
* Cleaving
- Rapidly cuts through the ground, not having to be blocked by melee units, but is halved in speed and damage per soldier that it cuts through at once.
* Detonates
- Explodes in death, but because it's underground, it only damages other Tunnellers by 100 True Damage.
Thoughts: Though this level is more anti-barracks than the previous one, these enemies demand high-level troops, or else they won't be vulnerable to being killed. Bladesingers can halve the speed and damage and additional time, but only Forest Keepers can toss spears and damage a slowed Tunneller. Druid attacks can help to further stack slows on them with each boulder that makes contact, which is especially effective as it will hurt other foes with them.
Absorbaton
Using the natural speed advantage of the Bandersnatch form, it wields the heaviest possible equipment without becoming immobilised, while also shielding its kin at the cost of its own, near-infinite durability..
Similar to a Forgesnatch, the Absorbaton is in the shape of a Bandersnatch but made out of metal. However, this one is larger than a normal Bandersnatch, and trumps even the Cerberus in size. Very large, heavy plates protect every joint and body part, with a glowing green core in the middle that matches its eyes and mouth, filled with burning, misguided energy.
HP: 6,000/7,500/9,000
Melee: 70-120 Raises an arm over 2 seconds before slamming it down for AOE physical damage.
Armour: High (80%)
Speed: Slow
Lives: 10
Gold: 400
* Absorbs damage from allies
- Allied mechanised units have green, fluid shields around them, which absorb damage which is then transferred to the Absorbaton, which will apply its own resistances along with the allied unit's resistances to the damage it receives. Multiple Absorbatons will continuously halve and share the damage amongst each other.
* Detonation
- After being slain, the core overcharges and explodes, removing the shields from nearby allies as well as dealing 500 True Damage in a large AOE.
Thoughts: AOE attacks are even more useful now, as Druids deal True Damage and will harm enough enemies to stack up larger amounts of damage to the Absorbaton, effectively making it less useful as it shields more clustered allies at once. Powerful spells near a big group of enemies are a great way to deal huge amounts of damage to the Absorbaton, but it is still a force to be feared. Forgesnatches will charge through at great speeds as anti-barracks enemies cleave a path for them. A well-used instakill can be effective, but players must find the balance between relying on instakills and crowd control, as they will clash and make the Detonation powers of many enemies become the bane of your soldiers.
Mechanics
Bonus Tower: Mechanical Marvel Mark I
A robotic suit that couldn't make it far due to its excessively heavy but salvageable weaponry load.
The tower is a green dome with 4 flat semicircles that shoot out sawblades from a flat opening. It stands on 2 somewhat thin robot legs that collapsed, and are now bent to the side, rendering it immobile. The dome also possesses and opening hatch that unleashes large, deadly drills from inside.
Repair: 400/200/200 G After initially being repaired, it can be further repaired to increase its fighting power. Each repair will make the green colour more vibrant as well as activate an additional "arm" for shooting.
Damage: 16-24 Shoots out sawblades that continuously slice through enemies, dealing the same damage every second for 4 seconds.
Speed: Very slow, once per 2 seconds with each individual arm shooting once in 4 seconds, evening out to keep a steady attack rate. Another repair enhances it to once every 1.33 seconds and again to every second, with 3 and then 4 arms total.
Range: Average, like starting level archers.
POWERS
Once fully repaired, all other weaponry becomes fully accessible, allowing 3 individual upgrades to be made.
Shredder: (16s; 275/275/275 G) Fires a drill at an enemy that deals 25/50/75 true damage per second and will shred the enemy until death.
(Can stack with other Shredder drills and Sawblades, dealing massive amounts of damage per second.)
Undermine: (30s; 400/400/400 G) Sends a slow/average/fast sawblade to carve a small/medium/large hole in the ground that takes down anything underneath it.
(The speed of the sawblades increase at an equivocal rate with the size of the circle, so that they always take 5 seconds to fully carve. Once done carving, any allied or hostile units can fall into the hole and die instantly, but the hole is repaired by drones that come from the villain's cave lair.)
Turbo Boosters: (Passive; 200/200/200 G) Gives the robot rocket boosters to let it hover around and shoot enemies in a very short/short/average range.
(Adds a rally point flag to direct the tower like the Battle Mecha, allowing it to shoot from the same range at a controllable vantage point within another range, multiplying its possible range with each upgrade.)
Tesla Coils
2 of these towers guard the cave entrance, where most of the enemies come from. These towers work like your own towers, in that they shoot at your troops when they come within range and are upgraded occasionally. They are large silver cubes with blue buttons on the front-facing surface, flashing and flickering. A large stem is at the top of the cube, which channels lightning into an orb to then be shot at a troop in range. It can fire at flying heroes, and the only exception to its attack is Durax, the elemental, who can absorb the shock blasts without being damaged, as well as Phoenix, who is already made of energy. The batteries behind them are cubic, black structures with 3 bars on them measuring the energy of the coils. Attacking them resets the respective Tesla Coil's ability timers and deactivates for 6 seconds. Lightning attacks cannot harm the batteries.
Range: Extreme (double that of a Wierdwood)
Damage: 99-182 Artillery Damage
Speed: Very Slow Blasts soldiers every 4 seconds in range.
Upgrades
-After certain amounts of minutes have passed, the Tesla Coils will be upgraded with one of many possibilities, and can receive all of the upgrades eventually. Upgrades are predetermined randomly and will make the AI save up until it can reach the predetermined upgrade's requirements for time to pass.
Chain Blast: (Passive, 2/2/2 minutes) Lightning blasts will chain to a 2nd/3rd/4th soldier within a secondary range barrier.
(Each upgrade enlarges the orb at the top of the tower which blasts lightning. The range barrier is double that of the normal range, and continues to double for each additional chain, just like the Tesla x104)
Redirection: (Passive, 5/1.5/1.5 minutes) Nearby mechanical units can be blasted to heal them for the damage dealt, as well as boosting their speed by 10/15/20% for 6 seconds.
(Adds 2 buttons and turns all buttons green instead of blue as well as adding a green tinge to lightning blasts. Stacks speed boost with itself and the second Tesla Coil. Blasts can chain from your troops to enemies and vice versa, accordingly healing or damaging targets.)
Thunderstruck: (25s, 3/3/3 minutes) Charges up a powerful blast over 5 seconds before unleashing the ultimate thunderbolt, disintegrating units in a small/medium/large AOE.
(Adds 5 rings around the stem of the tower, which glow with every second that it charges. Charging time is not included in cooldown. Blast goes from a Fiery Nut up to Eldritch Doom in size, with medium being in between. All heroes and summons can be disentegrated except for Phoenix and Durax. Attacking the battery near the tower will reset the cooldown of the skill and cancel any charging that it's doing. Infinite range, but it targets units based on how near they are and how much damage killing the group of them can do.)
Detonation Device
A large detonation device is brought in by some Gnomes at the end of wave 15, and one of them shouts, "Let's get this to the cave!" With Forgesnatches, Hellbringees, and occasional Absorbatons adding stress to your defences, the Gnomes will try to carry the machine to the mouth of the cave, arm it, and run before it blows up the cave and the coils around it.
The device has 2,000 HP and medium (50%) physical armor. It can be attacked by enemies, but reinforcements and heroes can go into melee with enemies attacking it, defending the otherwise helpless Gnomes. If it is protected well enough, it can make it past the Tesla Coils' attacks without getting destroyed and be able to blow up the cave, winning the game.
If destroyed, the Gnomes will flee back to the far left of the map before it explodes, destroying things around it excluding friendly or enemy towers. Paying 1,000 Gold will allow them to build another one and try to bring it to the cave again. The endless enemies will provide infinite gold to keep trying again and again until you win.
Wave Composition
1) Almost 100% Forgesnatches all coming on the upper path. They move in a straight formation, appearing once a second until there are about 7 of them, then there's a pause before this happens again. Setting up good defences on the top is encouraged here, with 2 level 3 barracks and a levelled Druid tower. Alternatively, 1 Lvl 3 barracks with lots of reinforcement and hero support accompanied by 2 Druids also works. On the bottom path are 2 side by side Hellbringers. Your hero should tank this or kill them with abilities if they're a glass cannon, as this bottom path won't need defences built yet.
2) More Forgesnatches spawn on the upper path, this time having 4 of them charge, with another 4 spawning 6 seconds later. The Tesla Coils activate now, shooting at your troops. They have no upgrades as of yet but will begin to save up for their randomly generated upgrade path. Calling all of the waves early may prevent them from fully upgrading. The dual pairs of Forgesnatches spawn twice more.
3) Cybersnatch time! 1 spawns immediately at the top, and another spawns in the same location later. The relentless Forgesnatches spawn once every 2 seconds, adding pressure to the larger enemy. It would be at this point that the player either activates the Mechanical Marvel to help cope with the tougher enemies or spam spells at them all, acquiring enough gold to upgrade it now since they'll really need it later.
4) Terminators come in from the top, ready to decimate your soldiers. Even if they plow through them, the slow-moving Hellbringers shouldn't be too bad. Just be sure to upgrade the AOE Instant kill of the MM to deal with all of the terminators, grouping them together by making them all stop to shoot at reinforcements while separating the Hellbringers from them.
5) Many Cybersnatches in this wave. One spawns with Forgesnatches, charging straight into your barracks and eventually breaking through when they all explode, leaving the Cybersnatch alive. At this point, 3 spawn all together on the top path, and then another 3. It's up to the player to slow them down and group them together for the AOE instakill to cool down and be used against all of them.
6) Tunnellers spawn on the lower path where nothing has been built yet. This is to make players rage so badly that they delete all of their data of Origins and vow to never play it again, only to find an addiction-like desire to play the game one more time, forcing them to buy everything back, ultimately earning more money for Ironhide.
The player should build and upgrade a barracks near the Mechanical Marvel so that it can kill the Tunnellers. If it has all 4 arms for shooting, this shouldn't be too bad, but upgrading the boosters to let it move is a good idea so that it can follow the rally point of the barracks and catch leaking Tunnellers.
7) The bonus movement is especially helpful now, since more Terminators will appear on both sides. Keeping barracks in the furthest front without being struck by the Teslas is key here, since it will group up the Terminators more quickly. Then, the troops can be moved to the back where all of the towers are at, with the dense group of enemies following them, quickly being destroyed by AOE attacks. Upgraded Druids will help finish them off faster.
8) Forgesnatches add pressure to continuously incoming waves of Terminators, making barrack grouping strategies less useful. Instead, have either Wierdwoods with Clobber to stun the enemies all at once, or Archdruids with Runed Bears to stall Terminators while barracks stall Forgesnatches, grouping both into AOE-vulnerable legions. With both groups separate from each other, only one will receive the damage of the Druids, so the other group will have to be killed with either a lightning strike or the AOE Instakill of the MM.
9) An Absorbaton will make its first appearance along with more Terminators. These will be especially hard to kill with the Absorbaton buffing them, so reinforcements need to separate them. However, the slow Absorbaton will be protected by the Tesla Coils, so it won't work. Instead, keep the Absorbaton as close to the Terminators as possible so that the MM can instakill them all when they break through. This is easier to do if lightning was used on the last wave so that the power doesn't need to recharge at this wave.
10) Forgesnatches make a comeback, this time spawning in pairs at quick, constant rates on both sides. Now is the time to fully upgrade the bottom lane with Druids and Barracks to defend against them all. Eventually, Absorbatons will spawn on both sides, and any DPS towers will struggle to target them over the quickly-moving Forgesnatches. Therefore, they need to be held long enough for the Mechanical Marvel to instantly kill one with a group of Forgesnatches, and the other can be whittled down by your hero and all of your powers.
11) 10 Terminators, already grouped together, will come on both paths. They will ruin everything if the Absorbatons aren't dead yet, but should be no problem if they are. Afterwards, on both paths, Cybersnatches spawn in pairs every 5 seconds for 30 seconds. Keep upgrading the defensive abilities of Barracks all over the map to delay the enemies long enough for the AOE instakill. Some barracks all the way in the back, while risky, can group the enemies from both lanes into one region and double the efficiency of the instakill, but not for every group that spawns. Do what is possible to take down an enemy or 2 with your hero if possible.
12) With all of this money, the Mechanical Marvel should be fully upgraded, and most towers will also be close to full power. The player can sit back and relax as they watch Hellbringers constantly get slaughtered. That is, until the Absorbatons come in pairs in both sides. Now would be a better time to use one of the seemingly useless strategic points that levels always have and build a Golden Longbow with Hunter's Mark, which will maximise the damage dealt to the Absorbaton if it gets hit, or add a bit more damage if it strikes a Hellbringer sharing damage with the Absorbaton. Tunnellers reappear on the bottom, while Forgensatches come in comparatively larger numbers than the Tunnellers on the other path.
13) Absorbatons spawn one by one in the bottom until there are 7 of them, while in the top, Hellbringers, Cybersnatches, and Terminators combine to create an anti-barracks force, slowly but surely moving through without being stopped. Focus solely on slowing down one group so that the other is taken down by the Mechanical Marvel's AOE, and try to keep the remaining group in range long enough to also be killed. Saving lightning strike until after one has been killed is a great way to take advantage of the slowdown effect while also killing some of the enemies in the front to prevent leaks. At the end of the wave is another pair of Absorbatons on both lanes.
14) Cybersnatches spawn in pairs every 10 seconds now, but Absorbatons will also spawn, one unit every 15 seconds, for both paths, creating incredibly durable groups of enemies. This goes on for a minute before a swarm of 10 Tunnellers on each side spawn to hopefully make it through. Use tactics from earlier to kill the Absorbatons, and make sure there are lots of troops all over the map for the Tunnellers.
15) Absorbatons spawn on each lane every 2 seconds, and this goes on for a long while to stack up lots and lots of them everywhere. It ends after 10 spawn in. Meanwhile, Terminators add stress to barracks to prevent them from grouping the Absorbatons easily. If the player survives this, then the end of the level begins. See Detonation Device for further details. After destroying the cave entrance, defeating the last of the enemies will win the level.
Level 3: The Forbidden Depths
General, this is it! After destroying the cave, we thought we had finished the cruel creator of these machines, but alas! His lair was actually hidden underneath the cave! A massive, isolated city lies beneath the ground, with lanes leading to all sorts of rooms filled with half-finished contraptions of evil. This is not natural. This is not right.
The master of these machines, Cutwire the Gnome, awaits us down below, ready for a duel between the army of Linirea and the infinite swarm of robots at his command. This is his territory, with his rules. The troops say that they're prepared for the worst, but are you?
A cavern with darker rocks and more stalagmites and -tites than the Emberspike environment. 3 paths start from the top of the level, equidistant from each other. They form congruent S-shaped lanes that go down to the very bottom of the map, still equidistant from each other.
Returning Enemies: Redcap, Forgesnatch, Hellbringer, Absorbaton, Tunneller, Terminator
New Enemies: ...
Mechanics
Gold
Because of the tightness of the cave, no heavy forces could be brought into Cutwire's lair. Thus, the player starts with 0 gold and must use their hero and available spells to earn enough to start building defences.
Ceiling
Being inside a cave blocks out much of the outside world. Lightning Strike and falling spells like Eridan's, Lilith's, Faustus's, and Wilbur's will hit the top of the cave, not being able to harm the enemies underneath. However, the ceiling has 3,000 HP and can eventually be destroyed by hitting it with enough spells, allowing them to be used on enemies.
Every 500 HP taken off will also cause a random quantity of large rocks (1-5) to fall down on enemies, dealing 300-600 physical AOE damage. When the entire ceiling is toppled, larger rocks fall down at random locations, dealing 1,000-2,000 physical damage in a larger AOE and stunning enemies who survive.
Cutwire's Inventions
Cutwire has many contraptions at his disposal, all of which are deadly products of Hacksaw's own genius, forced out of him while he was captive.
To be continued.